Oven Baked Chicken Breasts: Tender, Juicy, Perfect Every Time
Say goodbye to dry, bland chicken breasts forever! The quest for perfectly cooked, tender, and juicy baked chicken breasts often feels like a culinary holy grail. Many home cooks struggle with achieving that ideal balance of flavor and moisture, resulting in dishes that are often disappointing. But what if we told you there’s a simple, reliable method that guarantees delicious results every single time?
This comprehensive guide will walk you through the secrets to preparing oven baked chicken breasts that are not only incredibly easy but also consistently tender, juicy, and packed with flavor. Whether you’re a seasoned chef or a kitchen novice, this tried-and-true approach will become your new go-to for weeknight dinners, meal prep, and entertaining alike. Forget the guesswork and embrace a technique that transforms a humble ingredient into a star dish.
The Secret to Perfectly Juicy Baked Chicken Breasts
Achieving tender and juicy results with baked chicken breasts isn't about magic; it's about understanding a few key principles. Many recipes promise perfection, but the true magic lies in a combination of proper temperature, precise timing, and a crucial resting period.
- Optimal Baking Temperature: We recommend baking your chicken breasts at 400 degrees F (200 degrees C). This higher temperature is vital because it creates a perfect balance. It's hot enough to encourage delicious browning on the exterior, developing rich flavors, while still allowing the interior to cook through evenly without drying out. A lower temperature might prolong cooking, leading to moisture loss, while a much higher temperature could burn the outside before the inside is done.
- The Power of Resting: This step is non-negotiable for juicy chicken. Once your chicken breasts are out of the oven, resist the urge to slice into them immediately. Instead, let them rest on a cutting board or platter for at least 5 minutes. During baking, the muscle fibers contract, pushing the juices to the center of the meat. Resting allows these juices to redistribute throughout the entire breast, ensuring every bite is succulent. Cutting too soon will cause those precious juices to run out onto your board, leaving you with dry chicken.
- Doneness is Key – Use a Thermometer: Guessing if chicken is done is a recipe for disaster (and potential food safety issues). The only reliable way to ensure your baked chicken breasts are perfectly cooked and safe to eat is by using an instant-read meat thermometer. Insert it into the thickest part of the largest chicken breast – it should register at least 165 degrees F (74 degrees C). Remember, cooking times are always estimates, as chicken breast sizes can vary greatly. A thermometer takes out all the guesswork.
- Even Thickness Matters: For consistent cooking, consider lightly pounding the thicker parts of your chicken breasts to an even ½ to ¾-inch thickness. This prevents thinner parts from overcooking while waiting for thicker parts to finish, ensuring uniform tenderness.
Essential Ingredients for Flavorful Results
While the technique is crucial, the right ingredients lay the foundation for a truly delicious dish. Our simple, yet effective, 5-ingredient recipe ensures maximum flavor with minimal effort.
- Boneless, Skinless Chicken Breast Halves: We recommend using four standard-sized (around 5-6 ounce each) boneless, skinless chicken breast halves. This cut is lean, quick-cooking, and incredibly versatile. Look for breasts that are similar in size to promote even cooking.
- Olive Oil: A drizzle of good quality olive oil serves multiple purposes. It helps to coat the chicken, preventing it from drying out in the oven by creating a barrier. It also promotes even browning and helps the seasonings adhere beautifully to the meat, enhancing flavor.
- Coarse Sea Salt: Don't underestimate the power of salt! Coarse sea salt provides a better texture and more controlled seasoning than fine table salt. It draws out the chicken's natural flavors and contributes to a delicious crust.
- Creole Seasoning: This is where much of the magic happens! Creole seasoning adds a vibrant blend of spices, offering a delightful depth of flavor and a touch of welcome heat. It typically includes paprika, garlic powder, onion powder, oregano, thyme, and cayenne pepper. However, the beauty of ingredient baked chicken is its versatility. Feel free to swap Creole seasoning for your favorite blend – think Italian herbs, lemon pepper, smoked paprika, or a simple garlic powder and black pepper mix to customize your dish.
- Chicken Broth: This essential liquid isn't just for cooking; it's the secret to an incredible pan sauce. Chicken broth will deglaze your baking pan, capturing all those delicious browned bits and creating a savory, flavorful sauce to pour over your finished chicken.
Step-by-Step Guide to Oven-Baked Perfection
Ready to create the best baked chicken breasts you've ever tasted? Follow these simple steps for a truly rewarding culinary experience.
- Preheat Your Oven: Start by preheating your oven to 400 degrees F (200 degrees C). Ensure your oven is fully preheated before placing the chicken inside for consistent results.
- Prepare the Chicken: Pat the chicken breasts thoroughly dry with paper towels. This is a crucial step! Excess moisture inhibits browning and can lead to steaming rather than roasting. Drizzle the chicken breasts generously with olive oil, then sprinkle both sides with coarse sea salt and your chosen seasoning (like Creole seasoning). Rub the seasoning into the chicken to ensure an even coating.
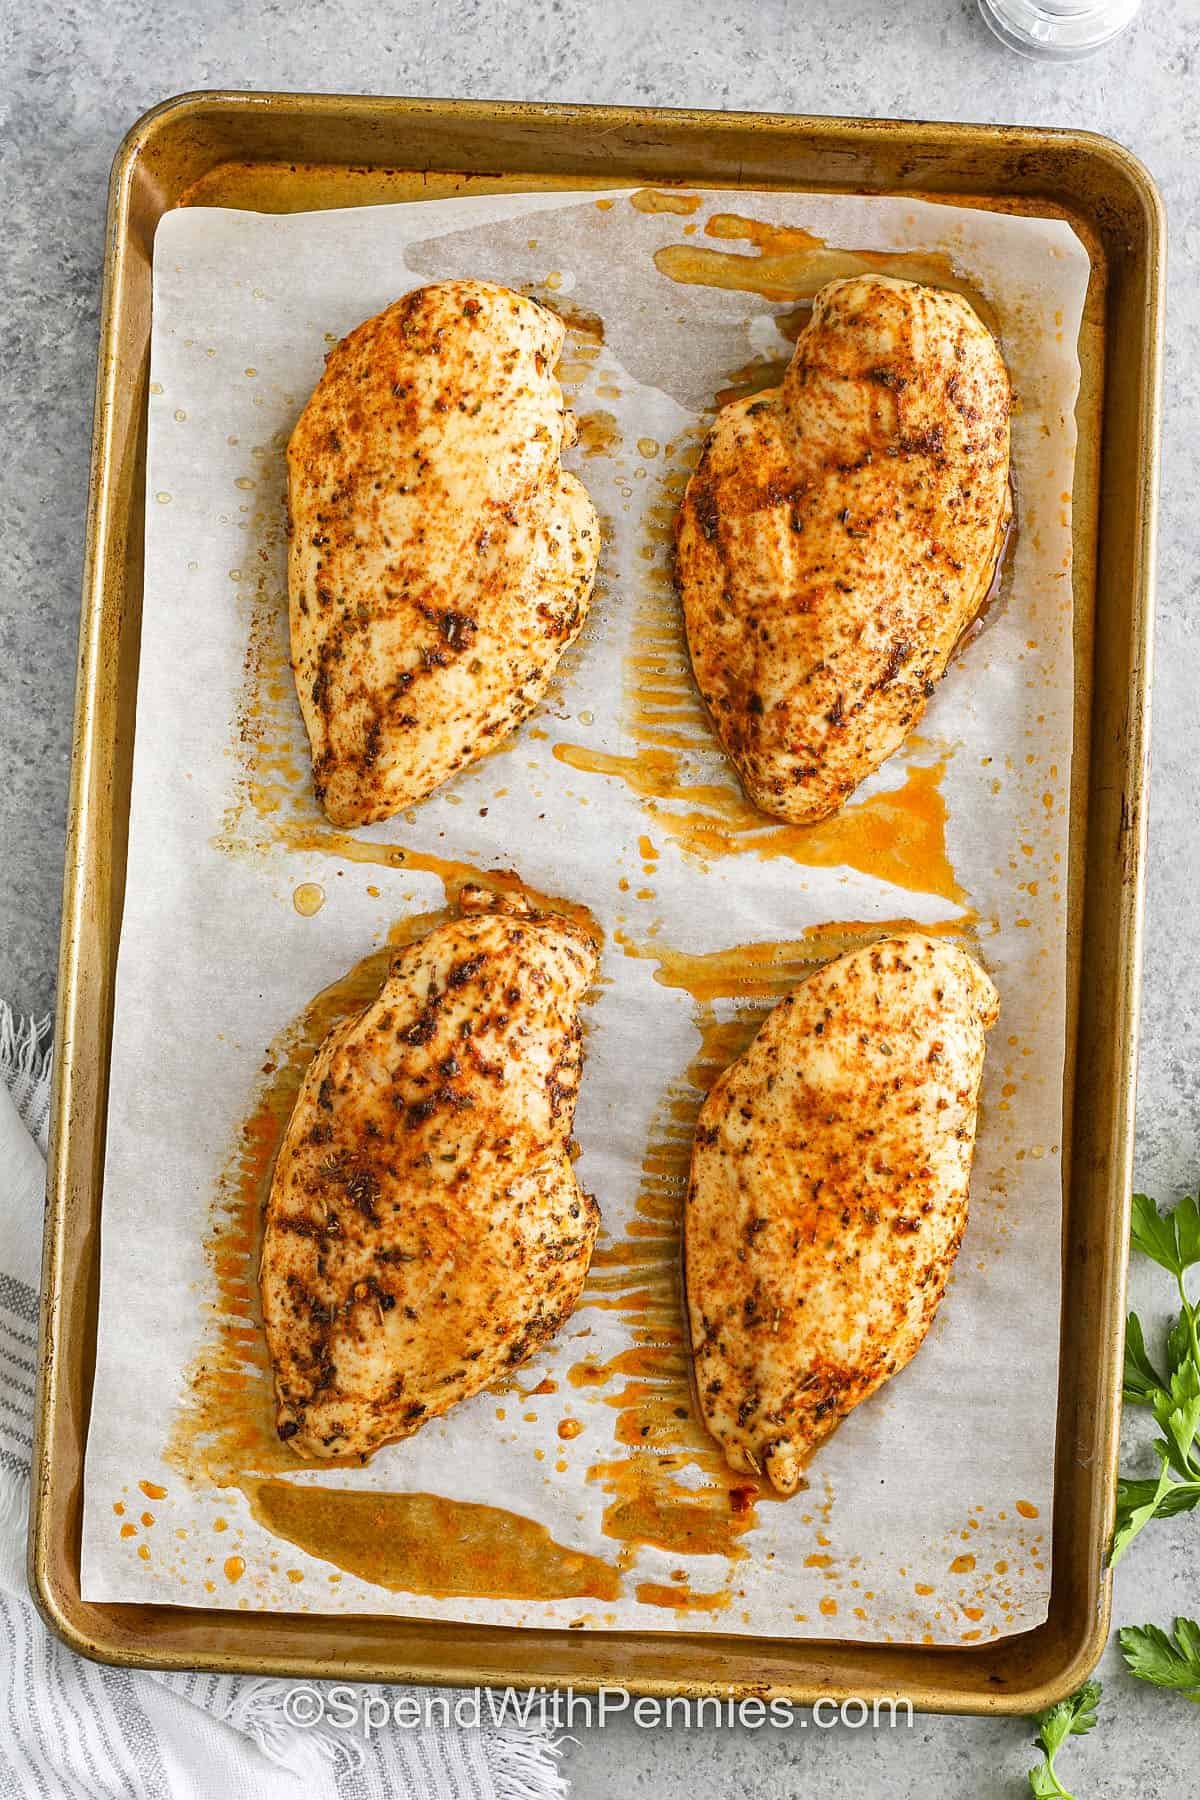
- Arrange for Baking: Place the seasoned chicken breasts in a single layer on a baking sheet or in a shallow baking dish. Ensure there's a little space between each breast for optimal air circulation and browning. Avoid overcrowding the pan.
- Bake Until Golden: Transfer the pan to the preheated oven. Bake for approximately 20-25 minutes for average 5-6 ounce breasts. Cooking time will vary based on the thickness of your chicken. The most important indicator of doneness is the internal temperature.
- Check for Doneness: After 20 minutes, insert an instant-read meat thermometer into the thickest part of the largest chicken breast. Once it reaches 165 degrees F (74 degrees C), remove the chicken from the oven. The juices should also run clear when pierced.
- Rest the Chicken: Transfer the cooked chicken breasts to a clean cutting board or plate. Tent loosely with foil and let them rest for at least 5 minutes. This resting period is vital for retaining moisture and ensuring juicy results.
Maximizing Flavor: The Ultimate Pan Sauce & Seasoning Variations
While perfectly baked chicken breasts are delicious on their own, a quick pan sauce elevates the dish to gourmet status. Plus, don't limit yourself to just one seasoning – the possibilities are endless!
Crafting a Quick Pan Sauce
Those delicious browned bits and drippings left in the pan after baking are pure liquid gold. Don't let them go to waste!
- Deglaze the Pan: While the chicken is resting, place the baking pan directly over a medium-low burner (if it's oven-safe, otherwise transfer drippings to a small saucepan). Pour in about ½ cup of chicken broth.
- Scrape and Simmer: Use a wooden spoon or spatula to scrape up all the flavorful browned bits from the bottom of the pan. Let the broth simmer gently for 2-3 minutes, allowing it to reduce slightly and concentrate the flavors.
- Enhance (Optional): For extra richness and a bright finish, stir in a teaspoon of unsalted butter and a squeeze of fresh lemon juice. Season with a pinch of salt and pepper to taste.
- Serve: Spoon this delectable pan sauce generously over your sliced or whole baked chicken breasts.
Endless Seasoning Variations for Your Baked Chicken Breasts
The beauty of this basic method for baked chicken breasts is its adaptability. Experiment with different flavor profiles to match your mood or meal plan:
- Mediterranean: Olive oil, dried oregano, thyme, garlic powder, lemon zest, black pepper.
- Smoky Southwest: Olive oil, smoked paprika, cumin, chili powder, garlic powder, a pinch of cayenne.
- Herb Garden: Olive oil, finely chopped fresh rosemary, thyme, sage, salt, and pepper.
- Garlic Parmesan: Olive oil, generous garlic powder, onion powder, dried parsley, and grated Parmesan cheese (added in the last 5 minutes of baking to prevent burning).
- Asian Inspired: A marinade of soy sauce, ginger, garlic, and a touch of sesame oil before baking.
Meal Prep, Storage, and Reheating Tips
Baked chicken breasts are not just for dinner; they're a fantastic component for meal prepping and versatile leftovers. Knowing how to store and reheat them properly ensures they remain delicious and safe.
Storing Leftovers
Once cooled, store any leftover cooked chicken breasts in a zip-top bag or an airtight container in the refrigerator for up to three days. This makes them perfect for quick salads, sandwiches, wraps, or as an addition to pasta dishes throughout the week.
Reheating for Optimal Juiciness
The key to reheating without drying out your perfectly cooked chicken is gentleness and moisture. Avoid high heat and prolonged cooking.
- Oven Method (Best for Whole Breasts): For best results, place whole chicken breasts in a baking dish with a few tablespoons of chicken broth or water. Cover the dish tightly with foil to create a moist environment. Heat in a preheated 325 degrees F (165 degrees C) oven for 15 to 20 minutes, or until it reaches an internal temperature of 165 degrees F (74 degrees C).
- Microwave Method (Best for Sliced Chicken): For a quicker option, slice the chicken breasts before reheating. Place the slices on a microwave-safe plate with a splash of broth or water. Cover with a damp paper towel and microwave in short intervals (30-60 seconds) until heated through, checking frequently to prevent overcooking.
Freezing for Future Meals
Freezing is an excellent option for extending the life of your chicken, whether raw or cooked.
- Freezing Raw Chicken Breasts: To freeze raw breasts, wrap each individual breast tightly in one layer of plastic wrap, followed by a layer of aluminum foil. Place them in a freezer-safe bag, removing as much air as possible. Label with the date. Raw chicken breasts can be frozen for up to two months. Thaw overnight in the refrigerator before cooking according to the recipe.
- Freezing Cooked Chicken Breasts: If you've baked extra for meal prep, allow the cooked chicken breasts to cool completely. Wrap each breast individually in plastic wrap, then in foil, or place them in an airtight, freezer-safe container. Cooked chicken breasts can be frozen for 2-3 months. Thaw in the refrigerator and reheat gently using the methods described above. Cooked frozen chicken is fantastic for shredding into casseroles, soups, or tacos after thawing.
Mastering the art of oven baked chicken breasts means unlocking a world of easy, delicious, and versatile meals. With these simple techniques and tips, you'll consistently achieve tender, juicy, and flavorful results that will impress every time. So grab your ingredients, preheat your oven, and get ready to enjoy perfectly cooked chicken!
